

In other words – did you know Lists could do this and that? We hope you’ll find a few useful, hidden gems in this quick read to jumpstart your information tracking. Maybe you’re just getting started with Microsoft Lists, or have been at it for a while. Regardless, Lists can help you and your team across numerous information tracking scenarios. Lists are simple to create and highly customisable based on whatever types of information you want to track or level of automation and formatting you want to build in. And we’re here to help you explore all that potential. Give it a scroll down and learn as you go.
#1 | Favouriting a list for easy access.
Getting back to work is one of the top actions we do, at the start of our days, when we return from a lunch break, of simply when we have a moment in the in-between. Thus, it’s important to be able to make your most important or active information easy and quick to get to.
Find the star icon next to your list’s title and click it to Favourite this list. You can do this from within the list itself, when you see it within your recent lists on the Lists home page, or within the Lists app for iOS. Once favorited, the list appears at the top of the Lists home page for web and mobile. And you can unfavourite a list at any time – simply click the star icon again to Remove this list from your favourites.


#2 | Create a list from a template.
One of the easiest ways to get started with Lists is by using one of the ready-made templates. There are 8 templates available (11 in Teams) that cover common scenarios like work progress tracker, asset manager, and employee onboarding – and of course, you can customise the list as you’d like from that starting point.
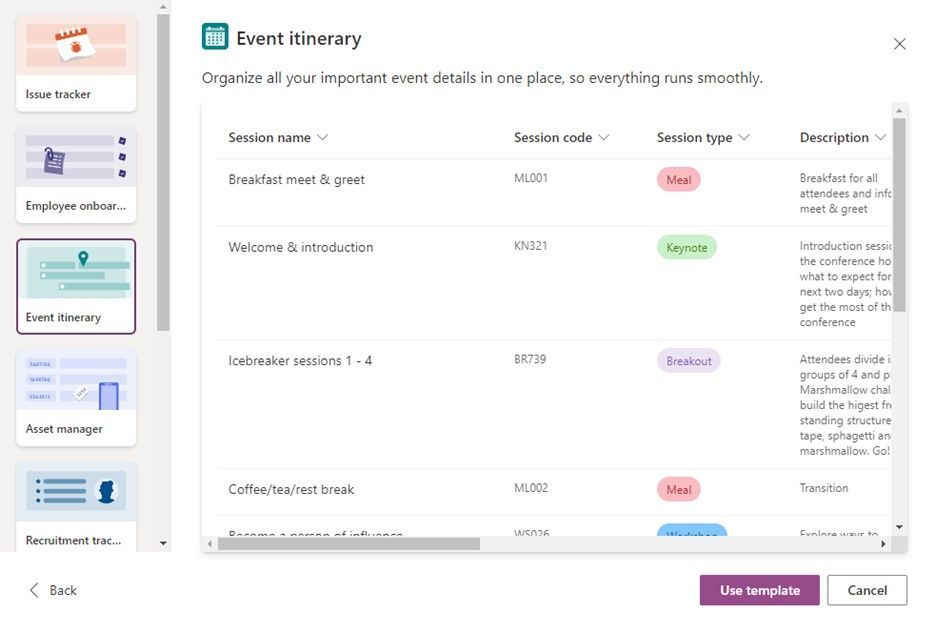
Once you find a template that fits your task at hand, click the Use template button, give your list a name, a colour, and an icon. And seconds later, you’ve a well-structured head start to track and organise your information – pre-defined columns, pre-populated Choice fields, and more.
Small roadmap note: soon, you’ll be able to create your own custom list templates. Once deployed, they appear side-by-side the ready-made templates when you click New list. For now, let’s call this capability, “Future Gem #2b” :)
#3 | Create a new list using the format and structure of an existing list.
Already have a perfectly formatted, perfectly configured list, and you want to replicate it for your next similar effort? You can create a list from an existing list that you or your colleague made so you don’t have to redo any work. When you do this, the entire list structure is copied, including views, formatting, and columns. However, the actual content of the original list isn’t copied.

#4 | Take lists with you on the go – Lists app for iOS (iPhone & iPad).
The Microsoft Lists app for iOS provides access to the lists you own and that have been shared with you. You can create new lists, edit list items, and easily share with other people. While sipping coffee – create an Issue tracker list. In the passenger’s seat zipping from place to place – share a link to the session item from a conference in the Event itinerary list. Or standing in a grocery line waiting to check out – update the status of an item based on information from a team chat. Work and information management don’t have to stop when you’re on the go.

#5 | Add a list to a Microsoft Teams channel.
Want your team to track, organise, and collaborate all in one place? Add a new or existing list to your Teams channel, and enjoy all the benefits of Lists with side-by-side chat.
To get started, simply go to any channel where you would like to start tracking a list and hit the “+” button to explore the tab gallery and select the Lists app. Once the tab is added you can either create a new list or bring in an existing list (from another team or an older SharePoint site, but not a personal list from Lists home) into the channel as a new tab.

And do not forget to try the Lists app experience in the Teams mobile app to track your lists within Teams on the go. Just go to your Teams android or iOS mobile apps and go to the channel where you have added the Lists app and click on more and tap on the tab name to open the list.
#6 | @mention colleagues in a list item and to the team chat
Sometimes team members just need a little nudge. Now, you can @mention contributors in both the Lists web app and the Lists app in Teams. Simply open a list item and @mention your colleague in a comment or conversation. This will trigger an email notification (if on the web app) or Teams notification (if using Lists in Teams), which links right to the list item. When a list item has a comment, an icon appears next to the item’s title. Select the icon to view comments about the list item. And if you posted the comment, you can delete it.

#7 | Visualise item milestones with a calendar view.
Are you tracking milestone dates or events? You can view your list as a calendar for a quick month-to-month snapshot. This is a view you must create, and it can live alongside numerous other default views or any other custom views you create. The more views the merrier – and oh how merry calendar view can be.

#8 | Make quick updates with grid view, including bulk actions.
Making a quick update or changes to multiple list items is super easy using Edit in grid view. Rather than opening individual list items and editing in the item card, you can double click on any item cell or select multiple cells and edit freely. And once in edit mode, you can use keyboard commands to navigate from cell to cell, you can add and adjust columns, and more.

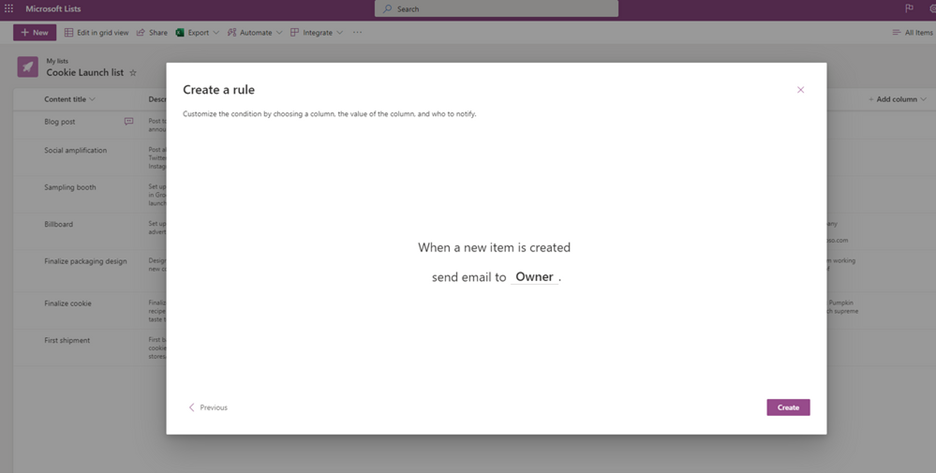
#9 | Get notified when information changes.
Want to really stay on top of your list? Create a rule to notify you or someone else when information in your list changes; for example, when a status gets updated, or a new item is added. You’ll get an email notification linking you right to the changed item.
#10 | Add conditional formatting to programmatically change how your lists and list items appear.
Improve the display of columns and rows in Lists with formatting based on certain criteria of your list items. You can set up formatting to highlight a cell or an entire row when certain conditions are met. Just open the column drop-down menu, select column settings, and format this column, and check the conditional formatting option. There, you can select manage rule to create a rule. Conditional rules are simple and sentence-based; for example, to highlight overdue items, your rule could read:
If [Deadline] [is before] [Today], show list item as [red colour].

Once you add one or more conditions, the list starts to become more visual, pulling your eye and attention to certain things you may need to find more easily, or see as important when items get updated. This is one that you try once, and for sure you’ll use in almost every list you interact with. With just a few clicks, you make the list work for you, conditionally speaking of course.
Hopefully, these tips sparked a few new ways you can use Microsoft Lists to help your team, or you stay organised and work more efficiently. If you would like advice or guidance on how to use some of the tools Microsoft 365 has to offer, don’t hesitate to get in touch. You can arrange a meeting with one of our team here, just choose the time that best suits you below.